Introduction
1. Understanding What a Heat Pump Is
Before diving into installation, it’s essential to understand what a heat pump is and how it works. A heat pump is a system that transfers heat from one place to another, providing both heating and cooling. It functions similarly to an air conditioner in the summer and a heater in the winter.
Types of heat pumps:
- Air-source heat pumps: The most common type, ideal for moderate climates.
- Ground-source (geothermal) heat pumps: More efficient but costlier upfront.
- Ductless mini-split systems: Perfect for homes without ductwork.
Understanding these options can help you choose the right unit for your specific needs and budget.
2. Benefits of Heat Pump Installation
Heat pumps offer numerous advantages compared to traditional HVAC systems. These benefits make them a popular choice for energy-conscious homeowners.
Key benefits include:
- Energy efficiency: They use less electricity than electric furnaces or baseboard heaters.
- Lower energy bills: Reduced utility costs over time.
- Eco-friendly operation: Fewer greenhouse gas emissions.
- Dual functionality: Both heating and cooling in one system.
- Low maintenance: Fewer mechanical parts mean less wear and tear.
Installing a heat pump is an investment that pays off in both comfort and long-term savings.
3. Assessing Your Home’s Needs
Before installation begins, you need to evaluate your home’s heating and cooling requirements. Factors like home size, insulation, local climate, and existing ductwork all play a role.
Steps to assess your needs:
- Conduct a Manual J load calculation to determine heating and cooling loads.
- Inspect existing ductwork for leaks or inefficiencies.
- Consider the placement of indoor and outdoor units for optimal performance.
Consulting with an HVAC professional can ensure that your chosen system is properly sized and situated.
4. Choosing the Right Heat Pump System
Once your home’s needs are assessed, the next step is selecting the right heat pump system. There are various models and brands, each with specific features and efficiencies.
Consider the following factors:
- SEER and HSPF ratings: Higher ratings indicate better efficiency.
- Noise level: Especially important for indoor units.
- Smart features: Wi-Fi controls, programmable thermostats, etc.
- Warranty: Check manufacturer and installation warranties.
Look for Energy Star-certified models to ensure top-notch energy performance.
5. Preparing for Installation
Proper preparation ensures a smooth and safe installation process. Whether you’re hiring a contractor or doing a DIY project, readiness is key.
What to prepare:
- Clear the installation area inside and outside your home.
- Ensure electrical capacity matches the heat pump’s requirements.
- Obtain permits if required in your area.
- Schedule with a licensed HVAC technician if not DIY.
This stage lays the foundation for a successful setup.
6. Installing the Indoor Unit
The indoor unit is responsible for distributing air throughout your home. It must be installed carefully for effective heating and cooling.
Steps involved:
- Mount the unit on an interior wall or ceiling.
- Connect refrigerant lines and drainage pipes.
- Install the indoor air handler and ensure proper airflow.
Proper placement ensures optimal comfort and minimal energy loss.
7. Installing the Outdoor Unit
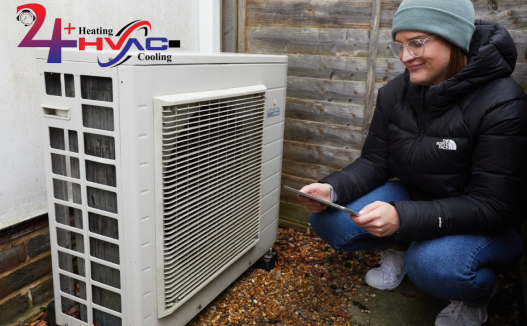
The outdoor unit is the heart of your heat pump system. It extracts or releases heat depending on the season.
Installation steps include:
- Place the unit on a concrete pad or mounting bracket.
- Ensure adequate clearance for airflow and maintenance.
- Connect electrical and refrigerant lines.
Make sure the outdoor unit is protected from snow, ice, and debris.
8. Electrical and Refrigerant Connections
Connecting your heat pump to your home’s electrical and refrigerant systems is a job best left to professionals.
Details to consider:
- A licensed electrician should handle all wiring.
- Ensure proper refrigerant charge for optimal performance.
- Double-check for leaks in refrigerant lines.
Safety is paramount, and incorrect installation can lead to system failure or hazards.
9. Testing the System
Once everything is installed, the system needs to be tested to ensure it’s functioning correctly.
Checklist for testing:
- Run the system in both heating and cooling modes.
- Verify correct airflow, temperature, and refrigerant pressure.
- Ensure the thermostat responds accurately.
This final quality check guarantees long-term reliability and comfort.
10. Maintenance Tips and Troubleshooting
Routine maintenance keeps your heat pump running efficiently for years.
Maintenance tips:
- Change filters every 1-3 months.
- Schedule annual professional inspections.
- Keep outdoor unit free from obstructions.
Common issues include:
- System not heating or cooling properly
- Strange noises or smells
- Ice buildup on coils
Knowing how to troubleshoot minor issues can prevent costly repairs down the line.
Conclusion
Heat pump installation is a smart investment in your home’s comfort and energy efficiency. By understanding each step—from selecting the right unit to regular maintenance—you can make confident, informed choices that lead to long-term savings and improved indoor comfort.
Ready to upgrade your home’s heating and cooling system? Trust the professionals at 24 Plus HVAC to handle your installation with care and expertise. Whether you need full heating services in Richmond or specialized heat pump solutions, we’re here to help. Contact us today for a free consultation and see why homeowners choose 24 Plus HVAC for their comfort needs year-round.

