Introduction
In recent years, ductless mini split systems have emerged as a popular choice among homeowners seeking efficient heating and cooling solutions. Their flexibility, energy efficiency, and ease of installation make them an attractive alternative to traditional HVAC systems. This comprehensive guide delves into the installation process of a ductless mini split, providing homeowners with essential insights to make informed decisions.
1. Understanding Ductless Mini Split Systems
Ductless mini split systems, often referred to as mini splits, are HVAC systems that provide heating and cooling without the need for ductwork. They consist of two primary components:
- Indoor Unit (Air Handler): Mounted inside the home, it distributes conditioned air into the living space.
- Outdoor Unit (Condenser): Installed outside the home, it houses the compressor and is connected to the indoor unit via refrigerant lines.
This configuration allows for targeted climate control, making mini splits ideal for individual rooms or zones within a home.
2. Benefits of Ductless Mini Split Systems
Homeowners opt for ductless mini splits for several compelling reasons:
- Energy Efficiency: Without the energy losses associated with ductwork, mini splits often operate more efficiently, leading to potential energy savings.
- Zoned Heating and Cooling: They allow for precise temperature control in different areas, enhancing comfort and reducing energy consumption.
- Flexible Installation: The absence of ducts means they can be installed in various locations, including older homes without existing ductwork.
3. Pre-Installation Considerations
Before proceeding with the installation, homeowners should address the following:
- Assessing Home Needs: Determine the specific areas requiring heating or cooling to decide on the number and placement of indoor units.
- Consulting Professionals: Engage with HVAC professionals to evaluate the home’s layout and recommend appropriate system sizes and configurations.
- Budgeting: Understand the costs involved, including equipment, installation, and potential additional expenses like electrical upgrades.
4. Selecting the Right System
Choosing the appropriate mini split system involves:
- Capacity: Ensuring the system’s capacity matches the room size for optimal performance.
- Features: Considering additional features such as programmable timers, remote controls, and air purification functions.
- Brand and Warranty: Researching reputable brands and understanding warranty terms to ensure long-term reliability.
5. Installation Steps
The installation process involves several critical steps:
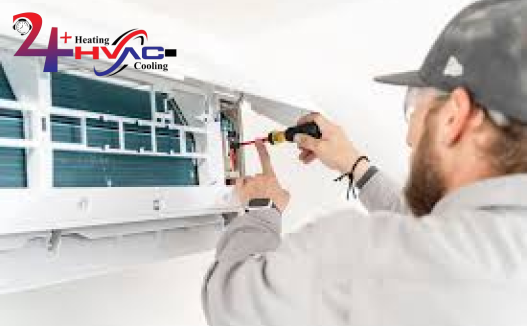
1. Mounting the Indoor Unit:
- Choose an appropriate location on an interior wall, ensuring it’s free from obstructions and allows for proper airflow.
- Secure the mounting bracket to the wall, ensuring it’s level and firmly attached to studs or appropriate anchors.
2. Drilling the Access Hole:
- Drill a hole (typically 2-3 inches in diameter) through the wall near the indoor unit to run refrigerant lines, drain tubing, and electrical connections to the outdoor unit.
- Ensure the hole slopes slightly downward toward the exterior to facilitate proper drainage.
3. Installing the Outdoor Unit:
- Position the condenser unit on a stable, level surface outside, preferably in a shaded area to enhance efficiency.
- Maintain adequate clearance around the unit for airflow and maintenance access.
4. Connecting Refrigerant Lines and Electrical Wiring:
- Run the refrigerant lines, drain tubing, and electrical wiring through the drilled hole, connecting the indoor and outdoor units.
- Ensure all connections are tight and insulated to prevent leaks and energy loss.
5. Sealing and Insulating:
- Seal the access hole with caulk or appropriate sealant to prevent air infiltration and pest entry.
- Insulate refrigerant lines to prevent energy loss and condensation.
6. Testing the System:
- After installation, test the system to ensure it’s operating correctly, checking for any leaks, unusual noises, or performance issues.
While some homeowners may consider DIY installation, it’s crucial to recognize that improper installation can lead to inefficiencies, reduced system lifespan, and voided warranties. Therefore, professional installation is highly recommended.
6. Post-Installation Maintenance
To ensure longevity and optimal performance:
- Regular Cleaning: Clean or replace filters monthly to maintain air quality and system efficiency.
- Professional Inspections: Schedule annual maintenance checks with certified HVAC technicians to identify and address potential issues early.
- Monitor System Performance: Be attentive to any changes in system performance, such as unusual noises or reduced efficiency, and address them promptly.
7. Cost Considerations
The cost of installing a ductless mini split system varies based on factors such as system capacity, brand, and installation complexity. On average, homeowners can expect to invest between $4,000 to $8,000 for a single-zone system. Additional costs may include electrical upgrades, permits, and potential modifications to accommodate the system.
8. Energy Efficiency and Savings
One of the significant advantages of ductless mini split systems is their potential for energy savings. By allowing zoned heating and cooling, homeowners can condition only the occupied spaces, reducing unnecessary energy consumption. Additionally, the absence of ductwork eliminates energy losses associated with traditional HVAC systems, further enhancing efficiency.
9. Environmental Impact
Ductless mini splits use refrigerants that have a lower environmental impact compared to conventional HVAC systems. Their high efficiency also means reduced energy consumption, contributing to a smaller carbon footprint. Choosing ENERGY STAR-certified models can further enhance environmental benefits.
10. Why Professional Installation Matters
Hiring a professional HVAC contractor ensures:
- Proper system sizing and placement for maximum efficiency.
- Correct refrigerant charging, preventing performance issues.
- Compliance with local building codes and manufacturer warranties.
For professional ductless mini split installation, homeowners can rely on trusted experts like 24 Plus HVAC. Their experienced technicians provide seamless installation and maintenance services.
Conclusion
Installing a ductless mini split system is a valuable investment that enhances home comfort, energy efficiency, and cost savings. By understanding the installation process, selecting the right system, and ensuring proper maintenance, homeowners can enjoy the full benefits of this modern HVAC solution. To schedule a professional ductless mini split installation, visit 24 Plus HVAC today. For additional air conditioning services, check out Air Conditioning Services in Burnaby.

